Before you can build AI agents, reasoning systems, tool-calling workflows, or autonomous applications, you first need to install and configure the:
OpenAI Python Library
The OpenAI Python SDK provides the foundation for interacting with:
- language models
- reasoning models
- structured outputs
- tool calling
- embeddings
- streaming APIs
- multimodal systems
- agent workflows
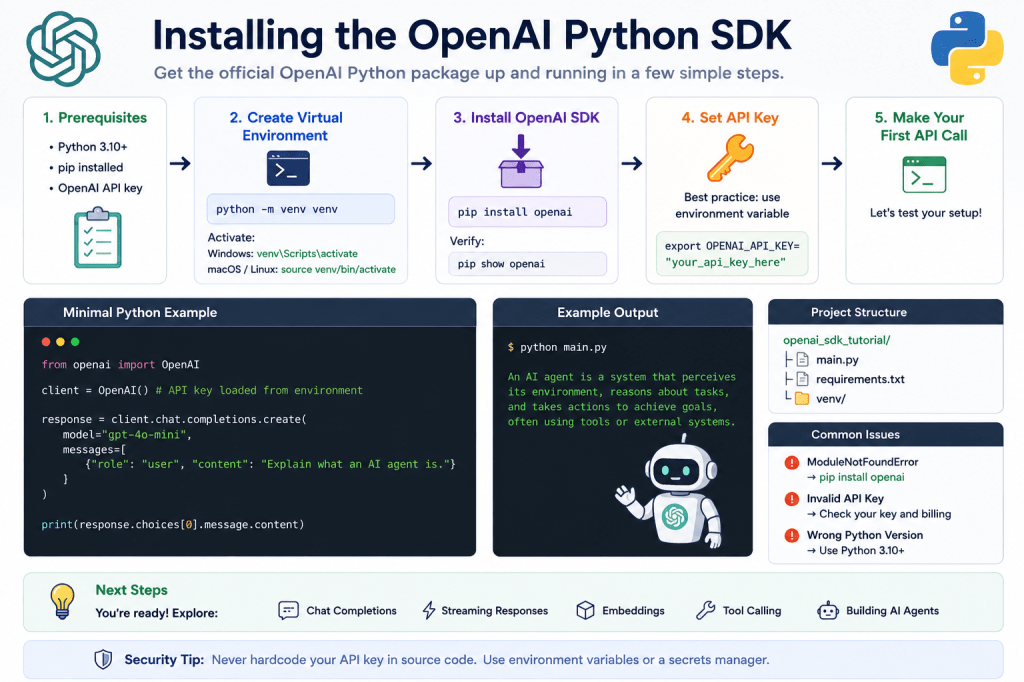
This tutorial walks through:
- installing the SDK
- configuring API keys
- making your first API request
- testing your environment
- understanding common setup issues
This is the first practical step toward building modern Agentic AI systems in Python.
What Is the OpenAI Python SDK?
The OpenAI Python Library is the official Python package for interacting with OpenAI models and APIs.
It allows developers to:
- send prompts
- generate responses
- stream outputs
- create embeddings
- build AI agents
- orchestrate workflows
- integrate reasoning systems
Instead of manually calling HTTP endpoints, the SDK provides clean Python interfaces.
Why the SDK Matters for Agentic AI
Modern AI agents rely heavily on:
- reasoning
- execution loops
- tool calling
- structured outputs
- orchestration
The SDK acts as the communication layer between:
- your Python application
and - the AI model
Almost every OpenAI-based agent starts with:
- SDK installation
- authentication
- model access
Prerequisites
You only need:
- Python 3.10+
- an OpenAI API key
- pip installed
You can verify Python installation:
python --version
Or:
python3 --version
Step 1 — Create a Project Folder
Create a clean project directory.
Example:
openai_sdk_tutorial/│├── main.py└── requirements.txt
This keeps your experiments organized.
Step 2 — Create a Virtual Environment
Using virtual environments is strongly recommended.
Create one:
python -m venv venv
Activate it.
Windows
venv\Scripts\activate
macOS / Linux
source venv/bin/activate
Once activated, your terminal usually shows:
(venv)
This isolates dependencies for your project.
Why Virtual Environments Matter
Without virtual environments:
- package versions can conflict
- global Python installations become messy
- projects interfere with each other
Professional Python AI development almost always uses:
- virtual environments
- dependency isolation
Step 3 — Install the OpenAI SDK
Install the official SDK:
pip install openai
This downloads:
- the SDK
- dependencies
- HTTP clients
- authentication utilities
Verify Installation
You can verify installation using:
pip show openai
Example output:
Name: openaiVersion: 1.x.x
Step 4 — Create Your First Python Script
Create:
main.py
Add:
from openai import OpenAI
This imports the SDK client.
Step 5 — Configure Your API Key
You need an API key to access models.
Example:
from openai import OpenAIclient = OpenAI( api_key="YOUR_API_KEY")
Replace:
YOUR_API_KEY
with your real API key.
Recommended: Use Environment Variables
Hardcoding secrets is not recommended.
Instead, use environment variables.
Windows
set OPENAI_API_KEY=your_api_key_here
macOS / Linux
export OPENAI_API_KEY=your_api_key_here
Then your Python code becomes:
from openai import OpenAIclient = OpenAI()
The SDK automatically reads:
OPENAI_API_KEY
from the environment.
Why Environment Variables Matter
Environment variables improve:
- security
- portability
- deployment workflows
- CI/CD integration
Production systems should never expose API keys directly in source code.
Step 6 — Make Your First API Call
Now let’s test the SDK.
Add:
from openai import OpenAIclient = OpenAI()response = client.chat.completions.create( model="gpt-4.1-mini", messages=[ { "role": "user", "content": "Explain what an AI agent is." } ])print(response.choices[0].message.content)
👉 You can experiment with a practical Python implementation of this concept in the official GitHub repository for the Programming Agentic AI examples: https://github.com/BenardoKemp/programming-agentic-ai/tree/main/installing-the-openai-python-sdk
Run the Script
Execute:
python main.py
If everything works, you should receive a generated response from the model.
Congratulations —
you have successfully connected Python to an AI model.
Understanding the API Call
Let’s break the code down.
Create the Client
client = OpenAI()
This initializes the SDK connection.
Select the Model
model="gpt-4.1-mini"
This specifies which model to use.
Provide Messages
messages=[ { "role": "user", "content": "Explain AI agents." }]
The SDK uses:
- role-based conversation formatting
Read the Response
response.choices[0].message.content
This extracts the generated text.
The Chat Completion Structure
Most modern OpenAI workflows revolve around:
Chat Completions
Structure:
System MessageUser MessageAssistant Message
This architecture enables:
- conversations
- memory
- agent loops
- reasoning workflows
Step 7 — Add a System Prompt
System prompts guide model behavior.
Example:
response = client.chat.completions.create( model="gpt-4.1-mini", messages=[ { "role": "system", "content": "You are a helpful AI tutor." }, { "role": "user", "content": "Explain embeddings." } ])
System prompts become extremely important in:
- AI agents
- workflow orchestration
- reasoning systems
Step 8 — Stream Responses
Streaming allows tokens to arrive incrementally.
Example:
stream = client.chat.completions.create( model="gpt-4.1-mini", messages=[ { "role": "user", "content": "Explain tool calling." } ], stream=True)for chunk in stream: print(chunk.choices[0].delta.content or "", end="")
Streaming improves:
- responsiveness
- user experience
- real-time interfaces
Common Installation Problems
Problem: “ModuleNotFoundError”
Example:
ModuleNotFoundError: No module named 'openai'
Solution:
pip install openai
Or activate your virtual environment first.
Problem: Wrong Python Version
Check:
python --version
Modern SDK workflows work best with:
- Python 3.10+
Problem: API Key Missing
Example:
OpenAIError: The api_key client option must be set
Solution:
- configure OPENAI_API_KEY
Problem: Invalid API Key
Example:
AuthenticationError
Verify:
- key correctness
- billing access
- environment variables
requirements.txt
Save dependencies:
openai
Install later using:
pip install -r requirements.txt
This is standard Python workflow management.
Why This Matters for AI Agents
Every advanced AI agent system starts with:
- model access
- API orchestration
- SDK integration
The SDK becomes the foundation for:
- tool calling
- reasoning systems
- memory architectures
- execution loops
- autonomous workflows
This tutorial is the first building block toward:
Agent Engineering
What Comes Next?
After installation, logical next steps include:
- Your First OpenAI API Call
- Chat Completions Explained
- Streaming Responses in Python
- Structured Outputs Explained
- Building Your First AI Agent
- Tool Calling Explained
- Reflection Loops
- AI Agent Memory Systems
These topics progressively build toward production-grade Agentic AI systems.
Related Topics
This tutorial connects closely to:
- Python Agent Programming
- OpenAI SDK Workflows
- AI Agent Architecture
- Tool Calling
- MCP
- Chain-of-Thought Reasoning
- Structured Outputs
- Agent Orchestration
Together, these concepts form the technical foundation of modern Agentic AI development.
Final Thoughts
Installing the OpenAI Python Library is the first practical step toward building:
- AI agents
- reasoning systems
- autonomous workflows
- tool-using AI systems
The SDK provides the bridge between:
- Python applications
and - modern AI models
As Agentic AI continues evolving, understanding the SDK and its workflows will become increasingly important for developers building the next generation of intelligent software systems.
 Programming Agentic AI